-1771628551.png)
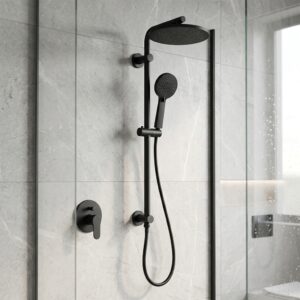
A clogged shower head can turn an otherwise relaxing shower into a frustrating experience. You may notice weak water pressure, uneven spraying, blocked nozzles, water coming out in different directions, or only a few spray holes working properly. In most cases, the problem is not a serious plumbing fault. It is often caused by limescale, mineral deposits, dirt, rust particles, or sediment accumulating inside the shower head over time.
The good news is that you can fix a clogged shower head without calling a plumber or immediately buying a replacement. With the right cleaning method, you can restore water flow and improve the showering experience. However, it is also important to understand why the shower head became clogged in the first place. Otherwise, the problem is likely to return.
This guide explains how to fix a clogged shower head, how to remove limescale and mineral buildup, how to clean shower head nozzles, how to deal with low water pressure, and when it makes more sense to replace the shower head altogether.
What Causes a Shower Head to Clog?
Before attempting to unclog a shower head, it helps to identify what is actually blocking the water passages. Different types of buildup require slightly different cleaning approaches, and understanding the cause can also help you prevent the problem from happening again.
1. Hard Water and Mineral Deposits
One of the most common causes of a clogged shower head is hard water. Hard water contains dissolved minerals, particularly calcium and magnesium. As water repeatedly passes through the tiny openings in a shower head, some of these minerals can remain behind.
Over time, they form a hard, chalky deposit commonly known as limescale.
The buildup can occur around the spray holes and inside the internal water passages. Initially, you may not notice anything unusual. Eventually, however, some holes become partially blocked, reducing water flow and causing an uneven spray.
2. Limescale Buildup
If your shower head has white, grey, or chalky deposits around its nozzles, limescale is a likely culprit. Limescale buildup on a shower head can become particularly noticeable around rubber spray nozzles.
A small amount of limescale may only affect a few holes. Heavy buildup can significantly restrict the flow of water.
3. Dirt, Rust, and Sediment
Not every clogged shower head is caused by hard water. Dirt, rust particles, and sediment from plumbing systems can also enter the shower head.
This can happen after plumbing work, installation of a new water tank, changes to the water supply, or disturbance of older pipes. These particles can become trapped in the small filter or passages inside the shower head.
4. Blocked Spray Nozzles
Modern shower heads often have numerous tiny spray outlets designed to distribute water evenly. When these openings become blocked, the shower may begin spraying unevenly.
If several nozzles are blocked, you may experience what appears to be low water pressure from the shower head, even when the water pressure entering the bathroom is normal.
What Are the Signs of a Clogged Shower Head?
Recognizing the symptoms early can help you deal with the problem before the buildup becomes severe. A shower head does not necessarily need to stop working completely before it requires cleaning.
Common signs include:
- Weak or reduced water flow
- Uneven spray patterns
- Some spray holes are not releasing water
- Water spraying sideways
- Water is coming out in irregular streams
- White or chalky deposits around the nozzles
- Reduced shower pressure compared with when the shower head was new
- Water is collecting around blocked openings
- A noticeable change in the shower’s spray pattern
If the shower head was previously working well and the water pressure has gradually deteriorated, mineral buildup or clogged nozzles should be among the first things you investigate.
How to Fix a Clogged Shower Head
Once you have established that the shower head itself is causing the problem, you can start cleaning it. The following method works well for many standard shower heads, particularly those affected by mineral deposits and limescale.
The objective is simple: remove loose debris, dissolve mineral deposits, clean the individual spray openings, and flush everything thoroughly before reinstalling the shower head.
Step 1: Remove the Shower Head
Removing the shower head gives you much better access to the areas where mineral deposits and dirt accumulate. Before unscrewing it, turn off the shower and make sure the water is not running.
Most shower heads can be unscrewed by hand. If it is tightly fitted, use an adjustable wrench carefully.
If you use a wrench, place a cloth around the fitting first. This helps protect the finish from scratches and prevents unnecessary damage.
Do not force a corroded connection aggressively. If the fitting refuses to move, excessive force can damage the shower arm or plumbing connection behind the wall.
Step 2: Inspect the Shower Head
Before soaking the shower head, take a moment to inspect it. Look at the spray holes, inlet connection, filter screen, and internal components if they are accessible.
Check whether the blockage looks like:
- White or chalky limescale
- Brown or reddish rust
- Dirt or sediment
- Hair or other debris
- General mineral buildup
This inspection helps you determine how intensive the cleaning needs to be.
Step 3: Rinse Away Loose Dirt
Start by rinsing the shower head under running water. Turn it around and allow water to flow through the inlet and spray openings.
A gentle shake can help loosen particles trapped inside.
This step is particularly useful when dirt, rust particles, or sediment cause the blockage. There is little benefit in immediately soaking a shower head in cleaning solution if loose debris is still sitting inside it.
Step 4: Soak the Shower Head in Vinegar
For mineral deposits and limescale, white vinegar is a commonly used household cleaning solution.
Place the shower head in a container and add enough vinegar to cover the affected areas. If you prefer, you can dilute the vinegar with water, particularly for lighter buildup.
Allow the shower head to soak for several hours. Heavier deposits may require a longer soaking period.
The purpose of soaking is to soften and dissolve mineral deposits so that they can be removed more easily.
For a shower head that cannot be removed, place a plastic bag containing the vinegar solution around the shower head and secure it carefully. Make sure the affected spray area is immersed.
However, avoid leaving finishes, coatings, or delicate materials in an acidic solution for unnecessarily long periods. If you are unsure about the material or the manufacturer’s cleaning instructions, check the product documentation first.
Step 5: Clean the Shower Head Nozzles
Once the mineral buildup has softened, concentrate on the individual spray holes.
Use a soft toothbrush or small cleaning brush to loosen deposits around the nozzles. For rubber nozzles, gently rubbing the surface can help dislodge softened mineral buildup.
Avoid using sharp metal objects aggressively on the spray holes. It is easy to enlarge or damage the openings, which can permanently change the shower spray pattern.
For stubborn deposits, repeat the soaking and brushing process rather than applying excessive force.
Step 6: Clean the Inlet Filter or Screen
Many shower heads have a small filter screen at the water inlet. This component can collect sediment, rust, and other particles before they enter the shower head.
If the screen is accessible, remove it carefully and rinse it thoroughly.
A clogged inlet filter can restrict water flow even when the spray nozzles themselves appear relatively clean.
Step 7: Rinse the Shower Head Thoroughly
After cleaning, rinse the shower head thoroughly with clean water.
Allow water to flow through the inlet and out through the spray openings. Turn the shower head around and shake it gently to help remove loosened debris.
Do not reinstall it while the cleaning solution or loose particles remain inside.
Step 8: Reinstall the Shower Head
Carefully screw the shower head back onto the shower arm. Make sure the connection is properly aligned.
Avoid overtightening. A properly fitted connection should be secure without requiring excessive force.
Turn on the water slowly and check for leaks.
Finally, observe the spray pattern. The water should now flow more evenly through the shower head.
How to Clean a Shower Head Without Removing It
Sometimes removing a shower head is inconvenient, particularly when the fitting is difficult to access or you do not want to disturb the connection. Fortunately, you can clean many shower heads without removing them.
This method is particularly useful for routine maintenance and lighter limescale buildup.
Place a suitable plastic bag over the shower head and fill it with enough white vinegar solution to cover the spray openings. Secure the bag firmly so that it does not fall.
Leave it to soak for several hours, then remove the bag and rinse the shower head thoroughly.
Run clean water through the shower head for a few minutes before using it normally.
For heavily clogged shower heads, however, removing the unit is generally preferable because it allows you to inspect the inlet filter and flush the internal passages properly.
How to Remove Limescale From a Shower Head
Limescale can be one of the most stubborn forms of shower head buildup. It is particularly common where water contains high levels of dissolved minerals.
When dealing with limescale on a shower head, patience is usually more effective than aggressive scrubbing.
Start by soaking the affected area in a suitable descaling solution or white vinegar. Once the deposits have softened, use a soft brush to remove them.
For heavy buildup, you may need to repeat the process.
Do not use abrasive materials that can scratch chrome or other decorative finishes. Avoid strong chemical cleaners unless they are specifically suitable for the shower head’s material and finish.
If your shower head has a manufacturer’s cleaning recommendation, follow it.
How to Fix Low Water Pressure in a Shower Head
A clogged shower head is only one possible cause of low water pressure. Before replacing the shower head, determine whether the restriction is actually coming from the shower head.
Start by removing the shower head and briefly checking the water flow from the shower arm. If water flows strongly without the shower head attached but becomes weak after the shower head is installed, the shower head is likely restricting the flow.
If the water remains weak even without the shower head, the problem may be elsewhere in the plumbing system.
Possible causes include:
- Low incoming water pressure
- A partially closed valve
- Blocked pipes
- A clogged filter
- Plumbing restrictions
- Problems with the water supply
- A faulty pressure system
- A pump or tank issue
This is an important troubleshooting step because replacing a shower head will not solve a plumbing problem occurring upstream.
How Often Should You Clean Your Shower Head?
There is no universal cleaning schedule because water quality varies between locations and buildings.
However, regular inspection is a good habit. If your water supply has high mineral content, you may need to clean the shower head more frequently.
A practical approach is to inspect the spray pattern regularly and clean the shower head as soon as you notice:
- Reduced flow
- Uneven spraying
- Blocked nozzles
- Visible mineral deposits
- Water spraying sideways
Routine shower head maintenance is much easier than waiting until the unit becomes severely clogged.
How to Prevent Your Shower Head From Clogging
Once you have cleaned a shower head, the next step is preventing the problem from returning too quickly. Good maintenance can extend the useful life of the fitting and help maintain a consistent spray.
Regularly inspect the spray nozzles and clean visible mineral buildup before it becomes severe.
If your water supply contains significant sediment, consider whether the wider plumbing system needs an appropriate filtration solution.
You should also avoid using excessive force when cleaning the nozzles. Damaged spray openings can permanently affect the performance of the shower head.
Most importantly, address the source of the problem. If hard water is causing repeated limescale buildup, cleaning the shower head every few weeks may only treat the symptom rather than the underlying issue.
When Should You Replace a Clogged Shower Head?
Cleaning is usually worthwhile when the shower head is structurally sound, and the problem is simply mineral buildup. However, there are situations where replacement makes more sense.
Consider replacing the shower head if:
- The body is cracked
- The fitting is badly corroded
- Spray nozzles are permanently damaged
- Internal components are broken
- Cleaning does not restore acceptable water flow
- The finish has deteriorated significantly
- The shower head is old and inefficient
- You want a different spray pattern
- You want a modern water-saving shower head
- The unit no longer meets your household’s needs
A new shower head can also be an opportunity to upgrade to a high-pressure shower head, water-saving model, or modern bathroom fitting that better matches your requirements.
Should You Clean or Replace Your Shower Head?
The decision ultimately depends on the condition of the shower head and the cause of the blockage.
If the shower head is relatively new, structurally sound, and simply covered in limescale, cleaning is usually the first option.
If it is old, damaged, heavily corroded,d or repeatedly becomes blocked despite regular cleaning, replacement may be more practical.
As a technician would advise, do not spend excessive time trying to restore a shower head that has reached the end of its useful life. A good-quality replacement can provide better performance and offer improved water distribution and efficiency.
Frequently Asked Questions About Clogged Shower Heads
How do you fix a clogged shower head?
Remove the shower head if possible, rinse away loose debris, soak it in a suitable descaling solution or white vinegar, clean the spray nozzles, rinse thoroughly, and reinstall it. If water pressure remains low, investigate the wider plumbing system.
Can vinegar unclog a shower head?
White vinegar can help soften and remove many mineral deposits and limescale buildups. Its effectiveness depends on the severity of the blockage and the type of material involved.
How long should I soak a shower head in vinegar?
The soaking time depends on how severe the buildup is. Light deposits may require a few hours, while heavier buildup may need repeated treatment. Always consider the shower head manufacturer’s cleaning recommendations.
Why is my shower head suddenly low-pressure?
A blocked shower head, clogged inlet filter, partially closed valve, or wider plumbing issue can cause low pressure. Remove the shower head and check the water flow from the shower arm to determine where the restriction is occurring.
How do I unclog shower head nozzles?
Soak the shower head to soften mineral deposits, then gently clean the nozzles with a soft brush. Avoid using sharp objects aggressively because they can damage the spray openings.
How often should I clean my shower head?
Clean your shower head whenever you notice reduced water flow, uneven spraying, or visible mineral buildup. Homes with hard water may require more frequent cleaning.
When should I replace my shower head?
Replace the shower head when it is damaged, badly corroded, permanently blocked, inefficient, or no longer provides the performance you need.
Final Thoughts
A clogged shower head is often a relatively simple problem to solve, especially when the cause is limescale, mineral deposits, dirt, or blocked spray nozzles. Before replacing the entire unit, inspect it carefully and try a thorough cleaning process.
Start by identifying whether the restriction is actually inside the shower head. Clean the spray openings, inspect the inlet filter, remove mineral buildup, and rinse the unit thoroughly. If the problem persists even after cleaning, investigate water pressure and other plumbing components before assuming that the shower head is faulty.
For households dealing with persistent hard-water buildup, regular shower head cleaning and maintenance can make a noticeable difference. And when an old or damaged shower head needs replacing, choosing the right model can improve both water flow and the overall showering experience.
Find Quality Shower Heads and Bathroom Fittings at MK Homestyles
If cleaning no longer restores your shower head’s performance, upgrading to a suitable replacement may be the better solution. The right shower head should match your water pressure, bathroom setup, preferred spray pattern, and water-use requirements.
At MK Homestyles, you can explore bathroom fittings, shower heads, and other home improvement products for different household needs. Whether you are looking for a modern shower head, high-pressure shower head, water-saving shower head, or other bathroom accessories, MK Homestyles Kenya can help you identify a suitable option.
For dependable home improvement and plumbing-related solutions, contact MK Homestyles for product guidance and reliable solutions for your home, office, shop, or other property in Kenya.