
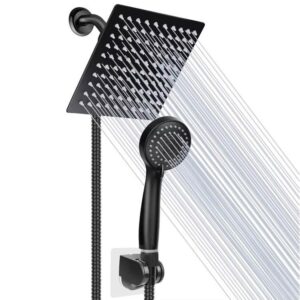
Installing a new shower head is one of the simplest bathroom improvement projects you can complete without hiring a plumber. Whether you are replacing an old, leaking shower head or upgrading to a modern luxury model, the right installation technique helps prevent leaks, protect your plumbing fittings, and ensure a comfortable shower experience.
For homeowners in Kenya, knowing how to install a new shower head can also save money on routine maintenance. However, successful installation involves more than simply unscrewing the old fitting and attaching a replacement. You need to check thread compatibility, inspect the shower arm, use plumber’s tape correctly where required, and test the connection before regular use.
This guide explains how to replace a shower head step by step, troubleshoot common installation problems, and choose the right shower head for your bathroom.
What Tools and Materials Do You Need to Install a Shower Head?
Before starting a DIY shower head installation, gather the necessary tools and materials. Preparing everything beforehand makes the job faster and reduces the risk of damaging chrome-plated fittings or scratching bathroom surfaces.
You will generally need:
– A compatible new shower head.
– An adjustable wrench, if required.
– A soft cloth to protect the finish.
– Plumber’s PTFE tape, where appropriate.
– A small brush or cloth for cleaning threads.
– A bucket or towel to catch residual water.
Most standard screw-on shower heads can be installed using basic household tools. Some models are designed for hand-tightening, so a wrench may not be necessary. Always check the manufacturer’s instructions before using tools.
Step 1: Check the New Shower Head for Compatibility
Before removing your existing shower head, confirm that the replacement will fit your shower connection. Shower heads are available in fixed, handheld, rainfall, and other designs, and their mounting arrangements can differ.
Check whether the new model connects directly to the shower arm, attaches to a flexible hose, or requires a separate bracket or adapter. Many conventional shower heads use standard threaded connections, but you should not assume every fitting is compatible.
If you are installing a handheld shower head, check the hose connection and wall bracket. For a rainfall shower head, confirm that the existing shower arm can support the fitting and that its position provides adequate clearance.
Technician’s tip: Compare the old and new connections before installation. Forcing mismatched threads together can damage both fittings and lead to persistent leaks.
Step 2: Remove the Old Shower Head
Once you have confirmed compatibility, the next step is to remove the existing shower head without damaging the shower arm or its wall connection.
Turn off the shower controls and allow any hot water to cool. For a typical shower head replacement, shutting off the main water supply is usually unnecessary, provided the shower controls stop the flow completely.
Wrap a soft cloth around the shower head connection to protect its finish. Try turning the old shower head anticlockwise by hand. If it is stuck, use an adjustable wrench carefully, gripping the fitting rather than applying excessive force to the shower arm.
Avoid twisting or bending the shower arm where it enters the wall. Excessive force can loosen a concealed connection, potentially causing a leak behind the wall.
If mineral deposits or corrosion have seized the fitting, use a suitable method recommended by the manufacturer rather than forcing it. Stop if the shower arm begins to move at the wall or the fitting shows signs of severe corrosion.
Step 3: Clean and Inspect the Shower Arm Threads
After removing the old shower head, inspect the exposed threads and sealing surfaces. Old plumber’s tape, mineral deposits, and dirt can prevent the replacement from seating correctly.
Use a cloth or soft brush to remove loose residue. Check for damaged threads, cracks, rust, or other signs of deterioration. The shower arm should remain secure at the wall.
If the threads are badly worn or the arm is loose, replace or repair the affected fitting before installing the new shower head. A damaged connection is unlikely to seal reliably, even when additional tape is applied.
This inspection is particularly important in bathrooms where hard water leaves mineral deposits on plumbing fittings.
Step 4: Apply Plumber’s Tape Correctly
Plumber’s PTFE tape is commonly used on threaded pipe connections to help seal the thread and prevent leaks. However, its use depends on the type of connection.
For a conventional shower head that seals at a threaded shower-arm connection, check the manufacturer’s instructions. If PTFE tape is recommended, wrap it around the external threads in the direction the shower head tightens, usually clockwise when looking directly at the end of the threads.
Apply a few neat, overlapping turns without covering the opening. Avoid excessive tape, which can make the connection difficult to tighten or interfere with proper thread engagement.
Some showerheads seal with a rubber washer or gasket rather than with the threads themselves. In these cases, the washer is the primary seal, and PTFE tape may be unnecessary. Ensure the washer is present, correctly positioned, and undamaged.
Important: Do not use extra tape to compensate for damaged threads, a missing washer, or an incompatible fitting.
Step 5: Install the New Shower Head
With the connection clean and prepared, you can now fit the replacement shower head. Correct alignment is essential because cross-threading can damage the connection and cause leaks.
Position the new shower head squarely against the shower arm or hose connector. Turn it clockwise by hand, keeping the fitting aligned. It should engage smoothly without excessive resistance.
Continue tightening until the connection is secure, following the manufacturer’s instructions. Hand-tightening is sufficient for many models. If a wrench is necessary, protect the finish with a cloth and use only the force required.
Do not overtighten the shower head. Excessive tightening can crack plastic components, damage washers, or strain the shower arm.
For a handheld shower head, fit the hose and washer correctly, then attach the head and check that the hose hangs freely without kinking. For an adjustable or rainfall model, position the head as directed by the manufacturer.
Step 6: Turn on the Water and Check for Leaks
The final installation stage is testing. A showerhead may appear secure yet still leak if the threads are misaligned, the washer is damaged, or the connection is insufficiently sealed.
Turn on the shower gradually and allow water to flow through the new head. Inspect the connection between the shower head and arm, as well as any hose connections.
Check for:
– Water dripping from the threaded connection.
– Water escaping around a hose connector.
– Unusual movement or looseness.
– Reduced flow or irregular spray patterns.
If you notice a leak, turn off the water and inspect the connection. Check the washer, thread alignment, and manufacturer’s sealing requirements before tightening or reinstalling the fitting.
Do not keep tightening a leaking connection indefinitely. If the leak persists, disassemble it and identify the cause. Replace damaged washers or fittings as necessary.
Common Shower Head Installation Problems and How to Fix Them
Even a straightforward shower head replacement can present challenges. Understanding the cause of a problem helps you avoid unnecessary repairs and achieve a reliable result.
1. Why Is My New Shower Head Leaking?
A leaking showerhead connection may have a missing or damaged washer, improperly applied PTFE tape, cross-threaded fittings, or damaged threads. Turn off the water, inspect the connection, and reseat the components correctly.
If water is leaking from the shower arm where it enters the wall, the problem may involve concealed plumbing. Seek professional assistance rather than applying more tape to the visible joint.
2. Why Is the Water Pressure Low After Installation?
Low flow can result from a clogged filter, debris in the shower head, a kinked hose, or an incompatible fitting. Check the manufacturer’s cleaning instructions and ensure the hose is not twisted.
A new shower head may also have a flow restrictor designed to conserve water. This is not necessarily a fault. If the pressure was already low before replacement, the underlying problem may involve the plumbing system rather than the shower head.
3. What If the Old Shower Head Will Not Come Off?
Mineral deposits and corrosion can make old fittings difficult to remove. Protect the finish, apply controlled force, and avoid twisting the shower arm inside the wall. If the fitting remains stuck or the arm starts moving, consult a plumber.
How to Choose the Right Shower Head in Kenya
Choosing a suitable replacement can improve everyday comfort while complementing your bathroom design. When comparing shower heads in Kenya, consider your water pressure, plumbing connection, budget, and preferred spray pattern.
Fixed shower heads are straightforward to install and suitable for many bathrooms. Handheld models provide greater flexibility for rinsing and cleaning, while rainfall showerheads offer a broader spray pattern but may require adequate water pressure and proper mounting.
Water-saving showerheads can reduce water consumption, though actual performance depends on the product and the water supply. Before purchasing, check the specifications, connection type, installation requirements, and warranty.
For a successful upgrade, choose a shower head that suits your existing plumbing rather than selecting a model based on appearance alone.
Frequently Asked Questions About Shower Head Installation
1. Can I install a shower head myself?
Yes. Many standard screw-on shower heads are suitable for DIY installation if the existing connection is in good condition and the replacement is compatible.
2. Do I need a plumber to replace a shower head?
Not usually for a straightforward replacement. However, professional assistance is advisable if the shower arm is damaged, the wall connection is leaking, or the new model requires plumbing modifications.
3. How long does it take to install a new shower head?
A simple replacement often takes around 10–30 minutes, depending on how easily the old fitting comes off and whether any cleaning or repairs are necessary.
4. Can I install a new shower head without plumber’s tape?
Yes, if the connection uses a suitable washer or gasket and the manufacturer does not require PTFE tape. Always follow the specified sealing method.
5. Will a new shower head improve water pressure?
Not necessarily. A new shower head may improve the spray pattern or performance, but it cannot automatically correct low pressure caused by inadequate supply, blocked pipes, or plumbing faults.
Upgrade Your Bathroom with MK Homestyles
Installing a new shower head is a manageable DIY project when you use compatible fittings, carefully remove the old unit, prepare the connection correctly, and test for leaks. Taking time to inspect the threads and washers can prevent recurring problems and help protect your bathroom plumbing.
If you are upgrading your bathroom, explore MK Homestyles Kenya for practical home-improvement products and accessories. Whether you are maintaining an existing bathroom or planning a fresh upgrade, MK Homestyles Agencies Limited is your destination for home and electrical solutions in Kenya.
Contact MK Homestyles for bathroom products, compare options, and find practical solutions to improve your home.